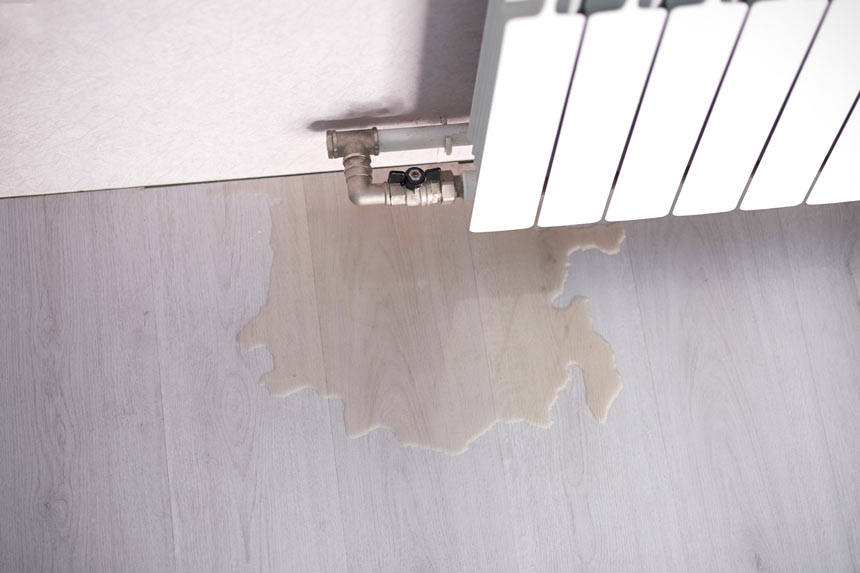
Radiators play a crucial role in keeping your houses warm and comfortable, but a small leak on them can prove quite annoying in different ways: from staining your carpet or floor to damaging your wall. But the good news is that you can fix leaking radiator on your own. These leakage problems can be fixed by yourself if you are just a tad bit handy with spanners and nuts. In this article, we will walk you through every step needed to fix the most frequent yet simple problems with leaking radiators at home to help you become your own technician. But to apply the following fixes, make sure you have at least an adjustable spanner, grips, and Teflon tape (PTFE) at your disposal.
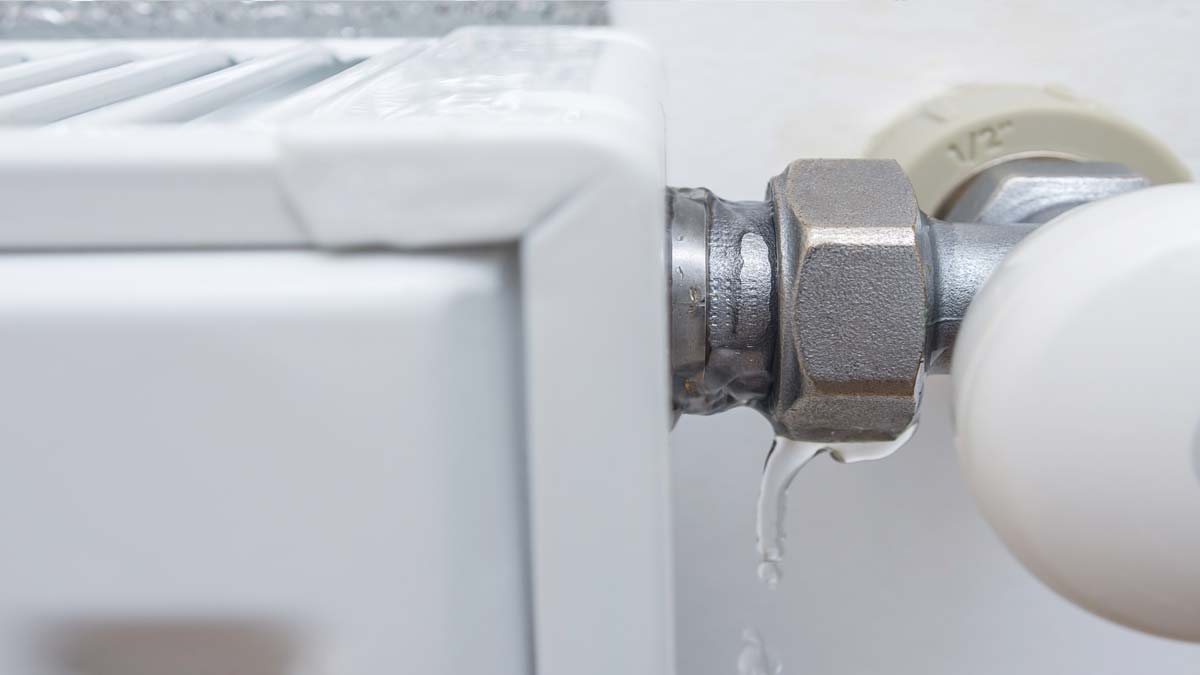
To begin with, you need to find the source of the leakage. If the radiator is too shabby, part of the fins or tubes is likely to be rusted, letting out water, but the rust will be detectable with the naked eye. In some other cases, the pipes might be rusty and the source of the leakage. Otherwise, as with most leaking radiators observed, the thermostatic radiator valve (TRV) at the bottom of the radiator is normally at fault. Just with tissue paper wrapped around the top and bottom of the valve, you can start inspection and find the source of the seeping water or moisture. The seeping water can also come from the nut which connects the valve to the radiator, so make sure that part will not go unnoticed.
Congratulations! You have taken a big step forward now, having spotted the misbehaving section where the tissue is saturated. Now, let’s go through the possible problems and solutions step by step, but before everything, you need to drain the radiator. Though not necessary for all repairs, it is recommended to shut off the central heating and let it cool down, especially if you do not have much experience with the workings of radiators. After all, you are not interested in making a jacuzzi inside the room! Next, have a container and kitchen towel handy and follow the following steps:
Steps to fix leaking radiator
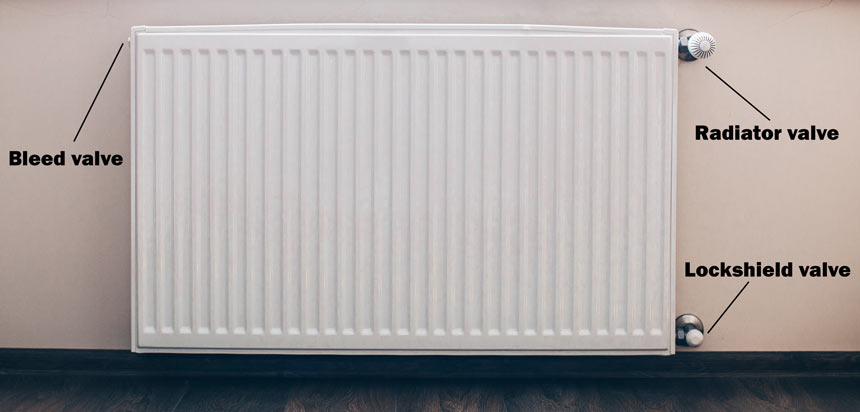
- Close the radiator and lockshield valves, as shown in the above picture. In some models, the radiator valve may not be thermostatic, so basically it will function as another lockshield valve.
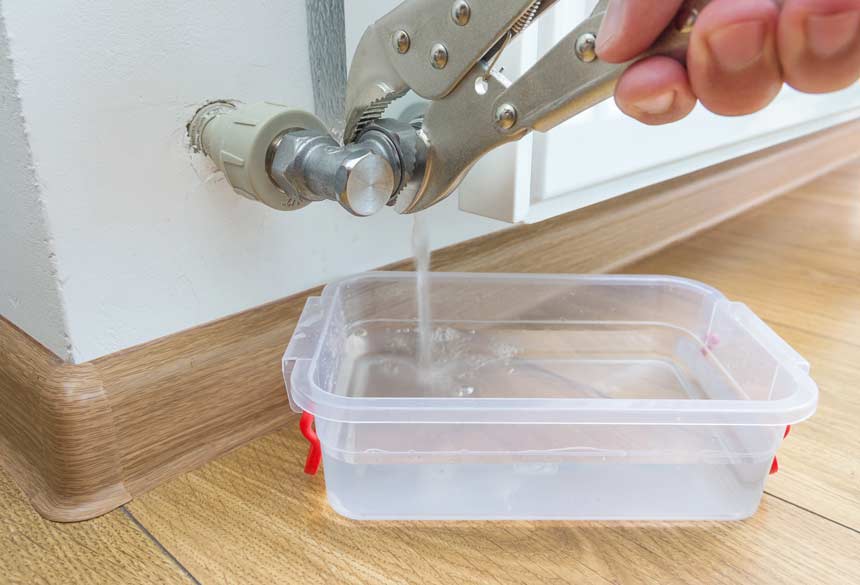
- Using your grips, hold the body of the radiator valve tightly and loosen its nut to the radiator using your spanner. While undoing the nut, water starts to flow out, so make sure you have the container beneath it.
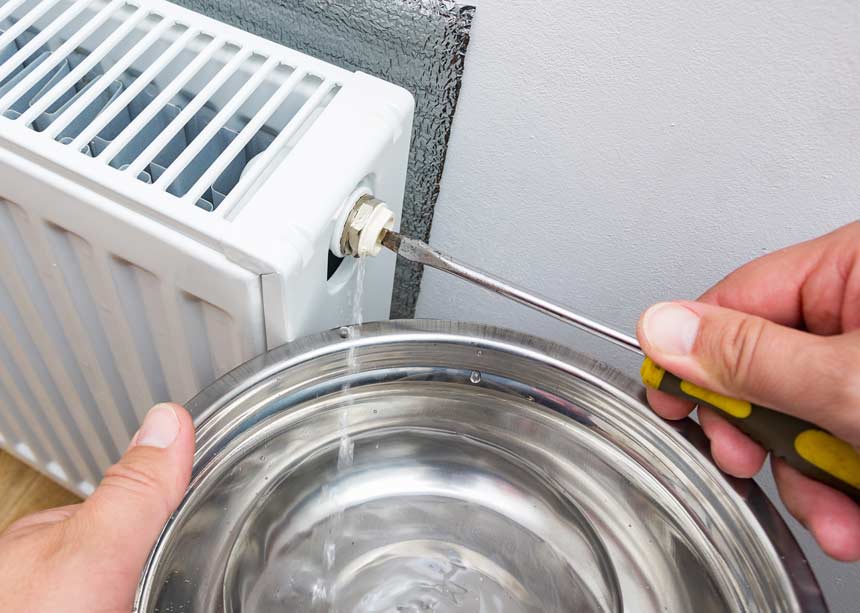
To accelerate draining, you must now open the bleed valve to let air into the radiator. This is done using the radiator bleed key. You may need to grip its nut while undoing the valve. If you do not have a bleed key, you can do it just with a flat-headed screwdriver. A filthy liquid may also flow out while unscrewing the bleed valve, so make sure you have a small container below it or a towel to soak it up.
3. To completely drain the radiator, you can apply the same procedures to the lockshield valve to disconnect the radiator, but that is not needed as long as we can comfortably apply the necessary fixes to the leaking valve without any disturbing water pushing out.
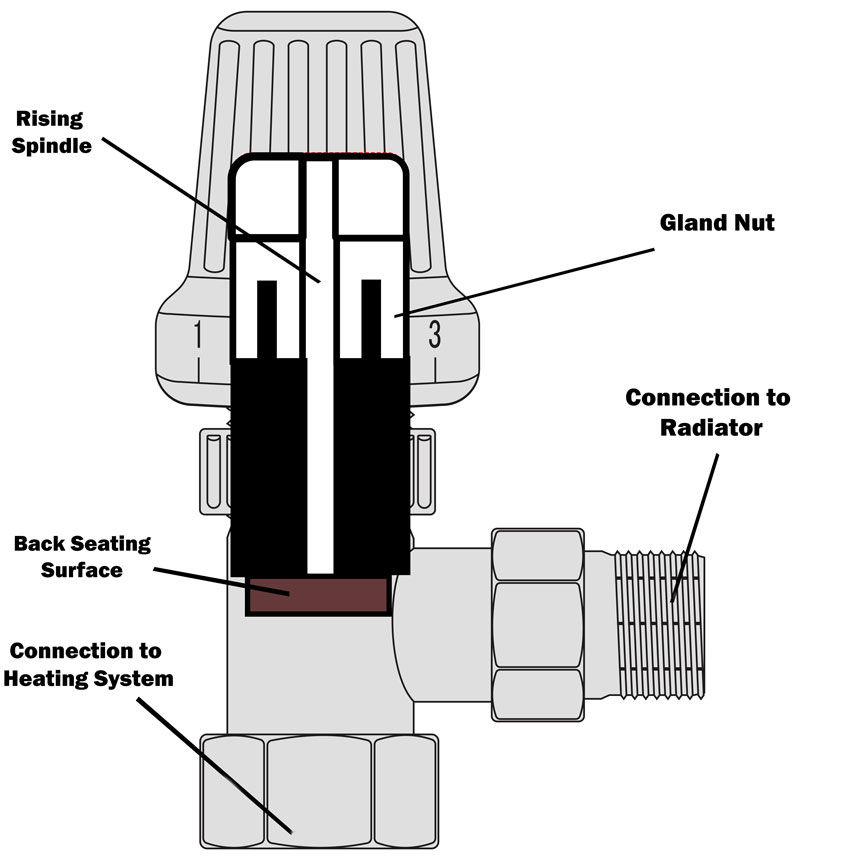
Now that you have drained the radiator, you can easily fix the leakage. Depending on the problem, one of the following fixes will be in order. However, to maintain a good command of the leaking radiator fixes offered in this article, you should first be familiarised with different parts of a typical radiator valve, as illustrated in the graphic below.
The problem lies with the union nut joining the radiator
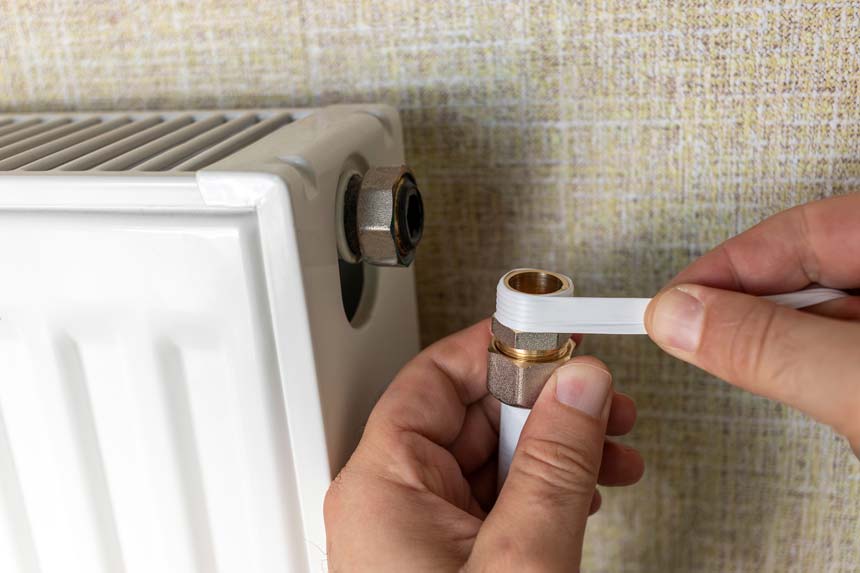
In this case the fix will be very straightforward. you just need to undo it completely, clean off the old sealant on the threads of the valve, and wrap some Teflon tape tightly around the threads about ten times before screwing it back into the radiator. While undoing the union nut, you may want to count the turns so that while closing it back, you do the same number of turns as was done originally by the plumber, though, basically, the tightening should continue till you feel it is healthily tight.
The leaking may as well be from the coupling nut connecting the valve body to the valve tail.
The leaking may as well be from the coupling nut connecting the valve body to the valve tail.
In this case, you need to undo the coupling nut by gripping the valve body and slackening the nut back via the adjustable spanner so that you have access to the olive. Now apply several wraps of PTFE to the olive in a way that the tape will not get unravelled when you replace the nut.
The tissue gets wet at the top of the valve in the fault-finding phase
then the (packing) gland nut should be investigated and serviced or repaired. You do not need to turn off the heating system to perform this repair; closing just the two valves (TRV and lockshield) will suffice.
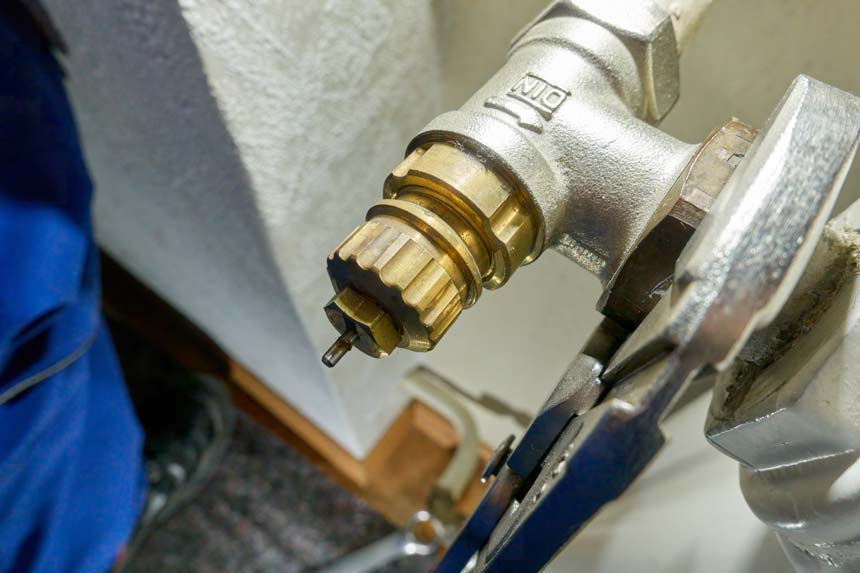
To start with, pull off the plastic cap at the top of the valve. Sometimes, the cap is held in place via a screw on the top, so you need to undo the screw if necessary. Next, you need to unscrew the gland nut via an adjustable spanner, as shown below.
When the nut is removed, apply about five wraps of Teflon around the gland and push it down into the packing with the help of a small screwdriver.
Then, re-screw the nut but be careful not to overtighten it as it will be counterproductive and will lessen the effect of the sealing. Finally, put the cap on with a small pressure down, and you are done with this sweet repair!
The tissue gets wet at the bottom of the valve, then the compression nut is to blame
As with the other repairs, grab the valve body and undo the nut with the adjustable so that you can PTFE-tape the olive. Make sure you wrap it in the same direction that the nut screws back, or the tape might unravel.
As the last step, tighten up the nut and then you are all done and can pat yourself on the back.
Eventually, after each fix leaking radiator, you need to test for leaks by putting the radiator back in full operation and carefully investigating the valve by wrapping tissue papers around it for a good amount of time; no moisture will be acceptable. If you have properly applied the instructions above, no doubt you have successfully tackled the problem.
Just make sure you properly perform the Teflon sealing to the threads and olives. Sometimes the olives may get slightly deformed or corroded, especially in old valves. In such cases, it is better to replace these tricky copper rings. In the end, it is recommended to add inhibitor to the heating system to protect the radiators, valves, joints, and pipes against corrosion, scaling and oxidisation. Decent treatment of the system can prolong the lifespan of your radiators from a minimum of five years to over 20 years.
To conclude, if you have come this far throughout this article, we are pretty much sure you have by now developed a firm understanding of the interworking of radiator valves and can confidently fix your leaking radiator at home. You learned how to fix a leaking radiator in a principled way. You can now effectively locate leakage from the union, coupling, gland, or compression nut. You will also be able to satisfactorily perform various fixes, such as draining and refilling radiators, sealing pipe joints with PTFE tape, and replacing defective olives.
That said, if you feel you need any quality plumbing, repair, fitting, or leaking radiator services, our experts will be just a call away at ProPlumber, round the clock. You can benefit from our fast response time, flat-rate pricing, proficient plumbers, and expert gas engineers. With over 10 years of experience, we offer excellent services at competitive prices, guaranteed!
You may also want to check our website at proplumber.uk, where there is multiple practical articles and guidelines waiting to assist you should you need practical guidelines and smart fixes. Hope to see you again soon!
How useful was this post?
Click on a star to rate it!
Average rating / 5. Vote count:
No votes so far! Be the first to rate this post.